
소개
안드로이드 공식문서 앱바 만들기
머테리얼 디자인 공식문서 앱바
필요에 따라 안 쓰기도 하지만 국밥 같은 앱 바입니다.
앱바, 툴바 두 가지로 불리는데 이유는 다음과 같습니다.
android 3.0부터 기본 테마를 사용하는 모든 액티비티에 ActionBar가 기본으로 제공됩니다.
앱바의 기능은 다양한 Android 출시 및 기능 추가로 인해 어떤 버전의 Android 시스템을 사용함에 따라 네이티브 ActionBar가 다르게 동작합니다.
가장 최신 기능은 Toolbar지원 라이브러리 버전에 추가되고 있으므로 ToolBar클래스를 이용해서 앱바를 구현하변 됩니다.
사전 준비
테마 설정
매니페스트에서 테마를 NoActionBar테마 중 하나로 설정합니다. ActionBar테마를 사용하게 되면 네티이브ActionBar를 사용하기 때문에 우리가 만들 커스텀 앱바에 방해됩니다.
매니페스트에서 직접 테마를 수정해도 되고 res -> value -> theme에서 수정해도 됩니다.manifest.xml
<manifest xmlns:android="http://schemas.android.com/apk/res/android"
          package="com.example.appbarexample">

  <application
    android:allowBackup="true"
    android:icon="@mipmap/ic_launcher"
    android:label="@string/app_name"
    android:roundIcon="@mipmap/ic_launcher_round"
    android:supportsRtl="true"
    android:theme="@style/Theme.MaterialComponents.Light.NoActionBar">
 ...
res -> value -> theme.xml
  <resources xmlns:tools="http://schemas.android.com/tools">
  <!-- Base application theme. -->
  <style name="Theme.AppBarExample" parent="Theme.MaterialComponents.Light.NoActionBar">
  <!-- Primary brand color. -->
...
화면 구성
activity_main.xml
<?xml version="1.0" encoding="utf-8"?>
<androidx.constraintlayout.widget.ConstraintLayout
xmlns:android="http://schemas.android.com/apk/res/android"
xmlns:tools="http://schemas.android.com/tools"
xmlns:app="http://schemas.android.com/apk/res-auto"
android:layout_width="match_parent"
android:layout_height="match_parent"
tools:context=".MainActivity">
<com.google.android.material.appbar.AppBarLayout
android:layout_width="match_parent"
android:layout_height="wrap_content"
app:layout_constraintTop_toTopOf="parent"
>
<com.google.android.material.appbar.MaterialToolbar
android:id="@+id/topAppBar"
android:layout_width="match_parent"
android:layout_height="wrap_content"
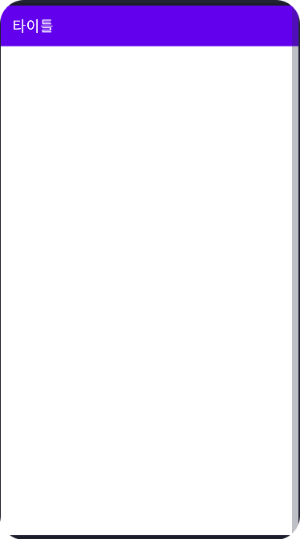
app:title="타이틀"
style="@style/Widget.MaterialComponents.Toolbar.Primary"
/>
</com.google.android.material.appbar.AppBarLayout>
</androidx.constraintlayout.widget.ConstraintLayout>MaterialToolbar를 바로 쓰지 않고 AppBarLayout를 쓴 이유는 머티리얼 디자인 앱 바의 다양한 기능(ex. 스크롤 제스처 등)을 구현하기 위한 목적입니다.
추가적인 기능이 필요하지 않으면 바로 MaterialToolbar를 사용해도 됩니다.
만일 내비게이션 버튼이 필요하다면 app:navigationIcon="원하는 아이콘"을 MaterialToolbar에 추가하면 됩니다.
메뉴 추가는 menu -> appbar_menu.xml을 만들어서 item을 추가해주면 됩니다.appbar_menu.xml
<?xml version="1.0" encoding="utf-8"?>
<menu xmlns:android="http://schemas.android.com/apk/res/android"
      xmlns:app="http://schemas.android.com/apk/res-auto">
    <item
            android:id="@+id/test1"
            android:title="test"
            android:icon="@drawable/ic_launcher_foreground"
            app:showAsAction="always"
        />
    <item
        android:id="@+id/test2"
        android:title="test2"
        android:icon="@color/white"
        app:showAsAction="withText"
        />
</menu>
showAsAction의 키워드는 다음과 같습니다.
| 값 | 설명 |
|---|---|
| ifRoom | 작업 항목을 표시 공간이 있다면 표시하고 없으면 오버플로 메뉴에 넣습니다. |
| withText | 작업 항목과 함께 제목 텍스트(android:title에서 정의함)도 포함합니다. 값을 파이프( l )로 구분하여 플래그 세트로 다른 값 중의 하나와 함께 이 값을 포함할 수 있습니다. |
| never | 작업 항목에 절대 배치하지 않고 오버플로 메뉴에 배치합니다. |
| always | 항상 작업항목에 배치합니다. |
| collapseActionView | 이 작업 항목(android:actionLayout 또는 android:actionViewClass에 의해 선언됨)과 연결된 작업 뷰는 접을 수 있습니다. |
아까 만들어 뒀던 MaterialToolbar에 추가하면 됩니다.activity_main.xml
<?xml version="1.0" encoding="utf-8"?>
<androidx.constraintlayout.widget.ConstraintLayout
  ...
        tools:context=".MainActivity">

    <com.google.android.material.appbar.AppBarLayout
    ...
    >

        <com.google.android.material.appbar.MaterialToolbar
          ...
          app:menu="@menu/appbar_menu"
        />
    </com.google.android.material.appbar.AppBarLayout>

</androidx.constraintlayout.widget.ConstraintLayout>
다 하면 아래처럼 나옵니다.

클릭 이벤트
클릭 이벤트는 간단합니다. MaterialToolbar의 setNavigationOnClickListener와 setOnMenuItemClickListener를 이용하면 간단하게 구현할 수 있습니다.
MainActivity.kt
class MainActivity : AppCompatActivity() {
    private lateinit var binding: ActivityMainBinding

    override fun onCreate(savedInstanceState: Bundle?) {
        super.onCreate(savedInstanceState)
        binding = ActivityMainBinding.inflate(layoutInflater)
        setContentView(binding.root)

        setAppbar()
    }
    fun setAppbar() = binding.topAppBar.apply {
        setNavigationOnClickListener {
            Toast.makeText(applicationContext, "Home Clicked", Toast.LENGTH_SHORT).show()
            true
        }
        setOnMenuItemClickListener {
            when (it.itemId) {
                R.id.test1 -> {
                    Toast.makeText(applicationContext, "test1 Clicked", Toast.LENGTH_SHORT).show()
                    true
                }
                R.id.test2 -> {
                    Toast.makeText(applicationContext, "test2 Clicked", Toast.LENGTH_SHORT).show()
                    true
                }
                else -> super.onOptionsItemSelected(it)
            }
        }
    }
}setNavigationOnClickListener은 네비 버튼 클릭 시 처리되는 이벤트고 setOnMenuItemClickListener는 메뉴 클릭 시 처리되는 이벤트입니다.
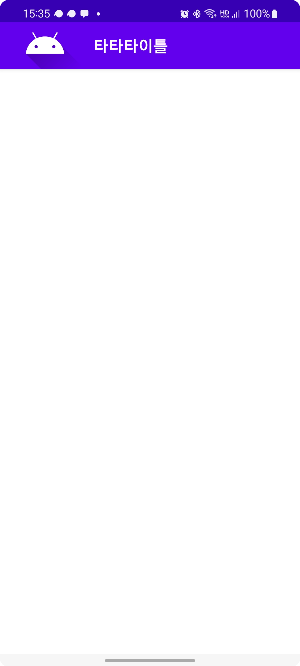
결과물
가장 기초적인 앱바를 만드는 방법을 알아봤습니다. 만약 다양한 기능의 앱바를 만들고 싶다면 머티리얼 사이트의 앱바를 참고해서 만들 수 있습니다.
'안드로이드' 카테고리의 다른 글
| 인터넷 연결 여부 판별하기 (0) | 2022.11.16 |
|---|---|
| BottomNav만들기 (0) | 2022.06.13 |